Other Naxxramas Guides

Instructor Razuvious
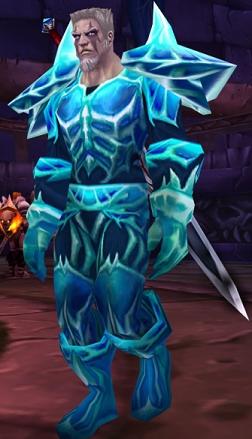
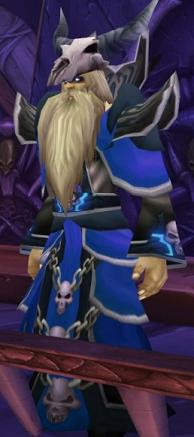
Priests are absolutely necessary for Razuvious, as the encounter is not beatable without them. They will need to Mind Control the adds around Razuvious to tank him. Other than that, the encounter is quite simple.
- Priests need to establish a rotation to tank Razouvious with the adds. They need to be Mind Controlled.
- There are four of these adds, Deathknight Understudies. They have a Taunt and a Shield Wall, each lasting 20 seconds. While one priest is tanking the boss with his add, it should always have Shield Wall up.
- Once the Shield wall runs out, the next priest will have to take over. It is important to get the Sield Wall up before taunting the boss.
- Razuvious has two abilities, one of them being Unbalancing Strike. This can one-shot almost any player, even Main Tanks in Naxxramas gear, if they are not ready for it. This is the reason why the Understudies need to be used to tank him.
- The other one is Disrupting Shout. This ability will hit every mana using player within line of sight of the boss. It will drain their mana, stun them and deal significant damage. To avoid this, the boss should be tanked at the bottom of the stairs, with the healers out of line of sight of the boss, but the tanking add within it.

Gothik the Harvester
For this fight, you will have to split your raid into two groups, as there will be two separate rooms. We will call them live side and undead side. Humanoid mobs will spawn on the live side, which is the side you enter the encounter. When they die, they turn undead and spawn again, on the undead side.
Crowd Control is very useful in this fight, again making Priests for their Shackle and Mages for Polymorph and Frostnova desired classes for the live side.
For the undead side, Warriors and Rogues are quite useful, for their various stun abilities. The live side should focus on controlling the adds and not killing them too quickly, as the undead side will need to deal with them again.
Live Side Kill Priority
- Unrelenting Rider
- Has an Unholy Aura, which deals continuous damage until he dies. He also has a Shadow Bolt Volley. They can only be slowed, but not CCed completely. A Horse and a Rider will spawn on the undead side once he is killed.
- Unrelenting Deathknight
- They have a 3 seconds stun and Shadow Mark, makink players susceptible to Shadow Damage. Unrelenting Deathknight can be Shackled or Frost Nova’d.
- Unrelenting Trainee
- They have a bleed DoT and a 2 second stun. Unrelenting Trainee can be Polymorphed, Feared, and Frost Novaed.
Undead Side Kill Priority
- Spectral Trainee
- Has an Arcane Explosion and can be stunned.
- Spectral Rider
- They have lots of AoE Damage in melee range. Tank them facing away from the raid and have your Rogues stun lock them until they die.
- Spectral Deathknight
- They have the same AoE Damage Aura as on the live side. Also casts a Life Drain on the highest threat target, which needs to be interrupted.
- Spectral Horse
- The only thing the horses have is Stomp, dealing physical damage and reducing the movement speed of hit players.
Phase 2
- Phase 2 starts after 4:30 have passed, when he teleports down into the center of the live side of the room. He will then Teleport between the two sides every ~15 seconds. Once he reaches 30%, the gate will open and both groups can nuke him down.
- Gothik the Harvester has a Shadow Bolt, which targets a random player and deals shadow damage.
- Harvest Soul is a stacking debuff which Gothik the Harvester will put on the entire raid, reducing Health and Mana by 10%.

The Four Horsemen
This is one of the most demanding fights in Naxxramas. The Four Horsemen encounter requires 8 tanks. 4 Tank to tank each of the Horsemen in their separate corners, and one to hold them there while the main tanks and the raid rotate their positions.
The reason for this is the Mark Abilities of the Horsemen, which is a stacking debuff. There are more details on the Mark effects below. The crux of this though, is that players should never get above 3 or 4 stacks. Tanks can push it a bit higher, but they should get out of range as well and have their off-tank take over for that time, to let the Mark run out.
General Abilities for all Horsemen
- Each of the Horsemen can be Disarmed, so the Warriors in the raid should absolutely be doing that.
- They will cast Shield Wall at 50% and 20%, lasting 20 seconds and reducing damage by 75%.
- Each horseman has a unique ability and a Mark Ability. The marks all have the same effect but stack separately. There’s a more detailed explanation of the Marks below.
- Enrage is a soft enrage which kicks in after about 20 minutes, when each horseman has cast his Mark 100 times.
- When a horseman dies, a Spirit Version of them will spawn on the corpse. It will continue casting Marks, so players need to get away from the Spirits as quick as possible.
Mark effect
- The first mark is cast 20 seconds into the fight and goes out every 12 seconds after that.
- Every Horseman casts their mark as an AoE, hitting all players in a 60 yard radius that can not be avoided by line of sight.
- Mark debuffs stack, similar to Firemaw debuffs. Each time a new Mark is applied, more and more damage is dealt to the player.
- The debuff lasts for 75 seconds, refreshing to the maximum duration each time a new stack is applied.
- The debuff can not be removed earlier by any spell or item, other than the player dying.
Horsemen Unique Abilities
Thane Korth’azz
Thane will target a nearby player, dropping a Meteor on them, splitting the damage amongst nearby allies of the target. The group of players attacking Thane Korth’azz need to stacked up tightly, to avoid being killed by a Meteor.
Lady Blaumeux Abilities
Lady Blaumeux will create Void Zones, similar to the ones in the C’Thun encounter in AQ40. Tanks need to watch their positioning and make sure they don’t get trapped.
Sir Zeliek Abilities
Sir Zeliek’s Holy Wrath is essentially a Chain Lightning that deals holy damage. He will cast it on the target with the most aggro every 12 seconds, then it bounces to a target within 5 yards, doubling its damage with every jump. To avoid this, everyone needs to keep their distance to the tank!
Highlord Mograine
Mograine has Righteous Fire, which is a chance on hit effect, dealing fire damage and leaving a DoT effect on the target, which is not dispellable.

Related posts
WoW Classic Thorium Farming
Terocone Farming Guide
Eternal Water Farming Guide
Subscribe
* You will receive the latest news and updates on your favorite games. We won't spam you, promise!

